Create Fossils at Home: Fun Science for Kids
Intro
Creating fossils at home is not just an exciting endeavor but also a fantastic way to learn about the Earth’s history and the science behind fossilization. Fossils tell us stories of ancient creatures, their environments, and how our planet has changed over millions of years. This guide will walk you through various methods to replicate the fossilization process, designed for young scientists aged 6-12. Parents and educators will also find a wealth of resources to support engaging and educational activities that inspire curiosity.
Science Fun Facts
Fossils hold secrets that can often be quite surprising! Here are some intriguing tidbits about fossils and the processes that create them:
- Did you know? Many fossils are not just bones! Some are impressions of skin, feathers, or even footprints.
- Fossilized tree resin, known as amber, has preserved insects and plants for millions of years, helping us to understand ancient ecosystems.
- The oldest known fossils are around 3.5 billion years old, showing that life once existed in a very different environment on Earth than we know today.
"Fossils are nature's time capsules, preserving history in a way that can’t be found by any other means."
Interesting Trivia and Facts
- The word "fossil" comes from the Latin word "fossilis," meaning "dug up."
- Some dinosaur fossils are so large that they can take up entire rooms in museums!
- The process of fossilization can take thousands of years, but you can simulate it in just a few hours with simple materials.
Quirky Science Stories
One fascinating story is about a mummified dinosaur discovered in 1999 in Canada. This fossil called the Dinosaur Pompeii shows that some dinosaurs even had their skin preserved, which gives scientists clues about their appearance and habits. You could say that these fossils are like ancient selfies, capturing moments from long ago.
Amazing Science Records
Records show that the largest fossil ever discovered is of a Titanosaurus, measuring up to 130 feet long. Imagine that swimming around where you live today!
Thought-Provoking Questions
- How do you think the environment changes over millions of years to create fossils?
- If you could ask a fossil a question, what would it be?
Discover the Wonders of Science
Creating fossils at home is a gateway to understanding a variety of scientific concepts ranging from geology to biology. Here’s how you can explore these fascinating fields through simple activities.
Exploring Various Scientific Concepts
When you engage in fossil making, you're not just crafting; you’re investigating how organisms are buried, preserved, and revealed over time. The primary concepts include:
- Sedimentation: How sediments cover remains, leading to the slow process of fossilization.
- Mineralization: This is where organic material transforms into rock-like substances, replacing it entirely.
- Impression fossils: These occur when organisms leave behind their shape in mud or sand, hardening into rock.
Educational Videos and Animations
Visual learning can enhance understanding. Websites like Britannica and YouTube have resources that show the fossilization process beautifully.
Interactive Learning Tools
Utilize tools available on platforms like Reddit or educational forums to find like-minded enthusiasts who might share their experiences or innovative ideas on home fossil creation.
Real-Life Applications of Science
Understanding fossils has implications beyond mere curiosity. It teaches us about ecosystem dynamics, evolutionary biology, and how climate change can affect life on Earth. This knowledge can shape your perspective on current environmental challenges.
Science Experiment Showcase
It’s time to roll up your sleeves! Here are some easy experiments to create your own fossils at home, with all necessary details.
Fun and Engaging Experiments
1. Make Your Own Fossils Using Clay
Materials Needed:
- Air-dry clay
- Small objects (like leaves, shells, or toy dinosaurs)
- Paint (optional)
- Marker or toothpick
Step-by-Step Instructions:
- Take a piece of air-dry clay and flatten it into a disk shape.
- Press the small objects into the clay firmly to create an impression.
- Optionally, you can paint the impressions once the clay dries.
- Label the fossil with a marker or toothpick.
2. Fossilized Footprints
Materials Needed:
- Flour
- Salt
- Water
- A tray or baking sheet
Step-by-Step Instructions:
- Mix equal parts of flour and salt, then add just enough water to form a dough.
- Flatten the dough on the tray and make footprints or impressions with various objects.
- Allow it to air dry to harden, simulating how footprints could fossilize in mud.
Safety Tips and Precautions
Always ensure that children are supervised during activities, especially when working with small objects and materials that can become messy. An apron or old shirt can help keep clothes clean.
Engaging in these activities can spark curiosity and foster a deeper appreciation for the Earth’s incredible history. Remember, the journey of discovery is just as rewarding as the outcomes!
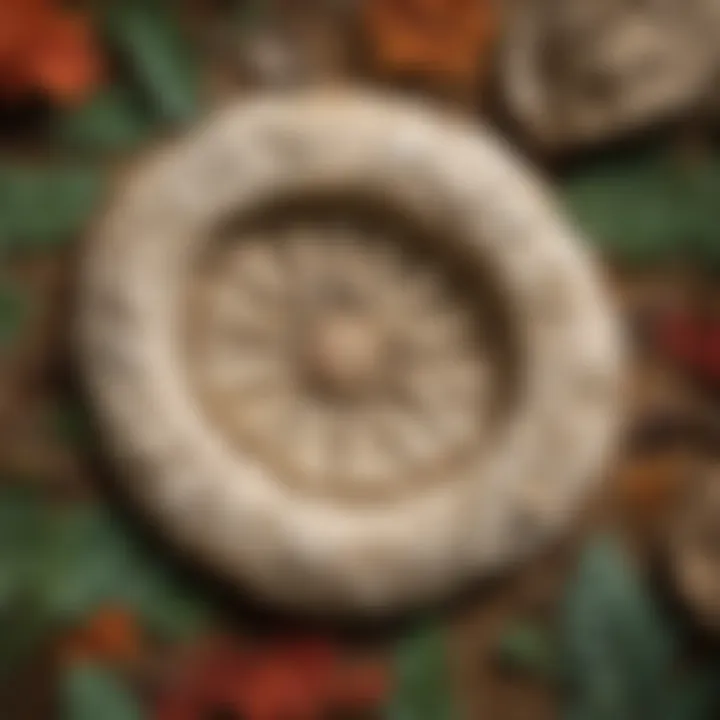
Plan to save the artifacts you create, or maybe even start a small fossil museum at home!
Understanding Fossils
Understanding fossils is not just about looking at pretty rocks or ancient bones. It opens up a window into the past, offering us clues about life that once thrived on our planet. Why bother with fossils? Well, the creation of fossils is a fascinating process showcasing how life exists and interacts with its environment over eons. When creating fossils at home, kids and their families can dive into a hands-on experience, learning key scientific concepts along with the actual fossilization processes. The excitement of seeing a real impression of a leaf or a footprint is a thrill that can't be replicated in a classroom lecture.
Definition of Fossils
Fossils are like nature's time capsules. They can be anything from skeletons of animals, leaves, or even traces of what creatures left behind. In simple terms, fossils are the preserved remains of ancient life. Formed when organisms die and get buried under layers of sediment, they slowly transform into fossilized forms over thousands to millions of years. It's like nature's way of ensuring that stories from the past don’t get lost.
Types of Fossils
Fossils come in various shapes and sizes, reflecting the diversity of life. Let's delve deeper into the primary types:
Body Fossils
Body fossils are perhaps the most recognizable type. These can include bones, teeth, and shells from long-gone organisms. One characteristic that stands out about body fossils is that they often give us direct insights into what an organism looked like and how it lived. They're particularly beneficial for young enthusiasts because they spark curiosity about ancient creatures, making science feel tangible. The unique feature of body fossils is in their complexity; they can be incredibly detailed, revealing everything from size to diet. However, they require careful excavation and preservation, which can be more demanding than other types.
Trace Fossils
Trace fossils, on the other hand, tell a different story. Rather than being parts of the organism itself, they showcase behaviors. Think of footprints, burrows, or even feces (yes, fossilized poop!) as markers of how creatures interacted with their environment. One key characteristic of trace fossils is their ability to provide insights into the animal's habits, such as whether it was a predator or prey, and how it moved. They're interesting choices for home projects, as the substance can often be made with simple household items. Trace fossils are a bit trickier to understand because they require interpretation, but they greatly enrich our knowledge of ecosystems that thrived long ago.
Chemical Fossils
Lastly, chemical fossils represent a different side of fossilization, focusing on the organic compounds that persist over time. These can include remnants like lipids or proteins that tell tales about the biochemistry of ancient life. What sets chemical fossils apart is that they often survive much longer than physical remains and can provide critical data on the environment and climate of the time. Their unique feature lies in their capacity to reveal information about life when traditional fossils are not available. However, they can be harder to analyze, demanding more advanced scientific techniques, making them less relatable for younger audiences.
The Importance of Fossils
Fossils are important for several reasons, spanning educational, scientific, and even philosophical realms. They help us understand life's evolution, the environment in the past, and how creatures adapted over time.
Understanding Ancient Life
Getting to grips with ancient life through fossils helps unravel the mysteries of our planet's history. This aspect is crucial for the project this article presents, as it connects kids to the rich human and animal narrative. A key characteristic of understanding ancient life is its relevance; children can better relate to creatures they might see today but didn't know shared ancestors with dinosaurs, for instance. The unique feature of this understanding is it stimulates wonder and inquiry, pushing the boundaries of what young minds can conceive.
Studying Geological Changes
Studying fossils also allows us to chart geological changes. Layers of earth that house fossils act like a book, revealing climatic shifts and continental movements. This understanding helps in grasping larger concepts of Earth sciences, which is beneficial for any budding scientist. Fossils can highlight patterns, tell tales of extinction events, and illuminate how ecosystems have evolved. This connection between life and geology adds depth to a fossil project; it shows fossil creation not just as art, but as documentation of our planet's ongoing narrative.
Evolutionary Evidence
Finally, fossils serve as evidence of evolution. They provide a timeline of development that scientists use to explain how species adapt. The study of fossil records is a key aspect of evolutionary biology, emphasizing how life is constantly changing. By introducing kids to the basics of evolution through fossils, the project described here helps in crafting a more curious and informed generation. The unique feature of this evolutionary evidence is in its ability to challenge current understandings, pushing kids to think critically about life's diversity and their role in this ongoing story.
"For the curious minds, fossils aren’t just remnants of the past; they’re invitations to explore science, history, and the natural world together.”
Understanding fossils allows not only for fun hands-on projects but also for deeper explorations into our planet’s history, climate, and the ongoing story of life itself.
Materials Needed for Fossil Creation
To create fossils at home, having the right materials is not just a convenience—it’s essential. The materials you choose can significantly impact the outcome of your fossils, making them either lifelike replicas or merely flat impressions. This section breaks down the common household items and tools that are crucial for this engaging activity, bringing both excitement and learning opportunities to life.
Common Household Items
Flour and Salt Dough
Flour and salt dough is often the go-to choice for many when starting the journey of fossil creation. This dough is not just easy to whip up but also safe for kids, which is a major plus for parents. You mix simple ingredients: flour, salt, and water, knead it into a dough, and voila! You have a fantastic medium for creating fossil impressions.
One of the standout characteristics of flour and salt dough is its malleability. Kids can easily mold it into various shapes or flatten it out for impressions. This flexibility allows for creativity, enhancing the learning process. However, it might not hold detail as well as some sturdier materials, so impressions can sometimes be less pronounced than with other options.
Plaster of Paris
Now, turning to Plaster of Paris, it’s a bit of a step up in terms of complexity but well worth the effort. This material is widely renowned for creating more durable and detailed fossils. Once set, it mimics the hardness and texture of actual fossils, making for a more realistic experience.
The unique feature of Plaster of Paris is how it hardens when combined with water, providing a sturdy result. Its downfall? It’s messier to work with, and careful measuring is required. But for kids eager to explore the world of fossils, the results can be absolutely rewarding.
Natural Materials for Impressions
Going beyond the usual suspects, natural materials for impressions add a delightful twist to the activity. Think leaves, shells, or small toys—the kind of items that are easy to find in your yard or at the park. These items not only create beautiful fossils but also allow kids to connect with nature.
The beauty of using natural materials lies in the authentic impressions they create. Each piece captures a unique texture or pattern, making every fossil one-of-a-kind. On the flip side, using natural items can sometimes yield unpredictable results based on factors like the moisture of materials or the type of dough used.
Tools Required
Molds
Molds are truly the unsung heroes of fossil making at home. They can be purchased or made from items around the house, like plastic containers. Molds help achieve specific shapes and can even imitate the natural contours of objects you’re trying to replicate.
The key characteristic of molds is their versatility. Depending on the complexity of the shape you choose, they can produce highly detailed fossils. Yet, cleaning can become a chore, especially if you use sticky materials.
Rolling Pins
A rolling pin is essential for flattening dough to the right thickness, ensuring a solid surface for creating your impressions. They’re easy to handle and typically just sit in the kitchen drawer waiting for a baking day.
The unique function of rolling pins aids in consistency. Using them, children can learn about measurements and even out the dough, which adds another educational layer to this endeavor. However, a rolling pin can take up space and may be a bit cumbersome for smaller hands.
Measuring Cups
Simple yet often overlooked, measuring cups are vital in ensuring that the ingredients for dough or plaster are accurate. This accuracy helps avoid mishaps during the mixing process, leading to better results in creating fossils.
Using measuring cups introduces children to the concept of precision, fostering essential skills in following recipes and scientific processes. Without them, people might guess, and that can lead to experiment failure—not ideal when trying to make great fossils!
As you gather these materials and tools, remember that each has its purpose and adds value to the fossil-making process.
Creative adaptations and choices will enrich the experience of making fossils at home, grounding it in science while keeping it fun and educational.
Step-by-Step Guide to Making Fossils
The journey of making fossils at home can be a thrilling and insightful experience. It’s not just about slapping together some materials to create something that looks like a relic from the past; it’s about understanding the process behind fossilization, which can tap into a child’s curiosity and creativity. Each step along the way teaches components of geology, art, and scientific inquiry. This section aims to illuminate that process by walking you through how to create impressions, cast fossils, and add finishing touches. Let's dig deeper into the particulars of making fossils.
Creating Impressions
Collecting Natural Objects
When you think about it, collecting natural objects is like holding nature’s storybook in your hands. This aspect of fossil creation is about sourcing leaves, shells, or even small animal tracks. Each of these pieces carries a unique history, and they can serve as excellent models for your impressions. The rich textures and features of natural items are what make them a standout choice in this activity. Plus, it gets kids outside, potentially fostering a new appreciation for their environment.
Collecting items from nature can also spark conversations about ecosystems, which is a huge plus. However, one must be mindful to collect respectfully, understanding that some areas may have restrictions about removing materials.
Making Impressions in Dough
Next step: getting hands-on with this gooey concoction of dough. Making impressions in dough is a favorite part for many. It's not only simple but also allows for creativity. Using flour and salt dough, kids can press the objects onto the surface to create their fossil impressions. The pliability of the dough means it can easily capture all the intricate details of any object used. It’s almost like the dough acts as a time capsule, holding the shape of the past.
The beauty of this part lies in its versatility. Different types of dough can result in varied textures and details, allowing for learning through experimentation. However, it can be a bit messy, so an old table or newspaper is recommended for clean-up ease.
Setting the Impression
Setting the impression is where anticipation builds. Once the impressions are made, allowing them to dry is crucial. It can feel like waiting for a cake to bake. This process can take several hours or even overnight, depending on the moisture content of the dough used. This downtime can be a great opportunity to discuss how actual fossils take thousands to millions of years to form in nature.
After the drying period is up, you’ll have unique impressions that kids will feel proud of. This step teaches patience and understanding of time—both in art and nature.
Casting Fossils
Preparing the Mold
As we transition into casting, preparing the mold can be seen as laying down a solid foundation for what’s to come. Selecting a mold material, such as a silicone or plaster mold, allows the impression to be captured beautifully. This step is crucial because it decides how well the final fossil will represent the initial design.
The characteristic beauty of preparing a good mold is that it can be reused time and again. While some might shy away, thinking it requires technical skills, using simple molds can make the process approachable. That said, measuring precisely is key—if the mix is off, it could ruin the final result.
Mixing Plaster of Paris
Hands down, mixing Plaster of Paris is quite a scientific endeavor. It’s a blend of gypsum and water that transforms from a malleable state to a hard and sturdy support. This chemical reaction is fascinating for kids to observe; the ability to watch something transform right in front of them ticks both the science and magic boxes.
A major advantage of using Plaster of Paris is its smooth finish, which beautifully showcases any details from the mold. However, careful attention is needed to ensure the mix is not too thick or too runny, striking that delicate balance can be a learning moment in itself. Also, Plaster of Paris sets fast, so be prepared to work quickly.
Pouring and Setting Process
After mixing, the pouring and setting process is where the magic happens. Pouring the plaster into the mold is akin to pouring a cup of liquid gold—with every drop, you’re one step closer to creating a unique fossil. This moment is thrilling, as children can visualize what they’re crafting. It's a clear example of how form follows function, mimicking how fossils have formed naturally over eons.
It's essential to let the plaster set undisturbed to ensure solid formation. The waiting time encourages discussions about geological timeframes, connecting back to those millions of years it took for fossils to develop in nature. However, a caution for all: handling plaster without supervision can lead to messy situations, so adult oversight is key.
Painting and Finishing Touches
Choosing Color Patterns
Once the plaster has set, it’s time for the fun part—choosing color patterns. This stage is where creativity can really run wild. Children can select colors that replicate real fossils or go completely imaginative, embracing a world where fossils can be rainbow-colored or metallic! The act of painting encourages children to personalize their creations, adding an element of ownership.
This step is beneficial as it encourages not just creativity but also planning. Kids can think about how color schemes work together, enhancing their artistic sensibilities. Sometimes, though, it might take a few tries to get the color just right, but that’s all part of the learning process.
Applying Paint
Applying paint is indeed like adding the final touches to a masterpiece. A good brush and some acrylic paints can work wonders here. While adding colors, discussions can arise about camouflage, environments, or even prehistoric critters, enabling a rich educational experience while the artwork captures their attention.
One notable characteristic of applying paint is its interactivity. Children can learn techniques in art, such as layering and blending, while having a tactile experience. However, a word of caution: make sure the workspace is protected. It can get a bit messy—think of every art class you’ve ever attended!
Sealing the Fossils
Lastly, sealing the fossils adds that professional touch. Finishing with a sealant can protect those colorful creations, and it’s crucial for preserving them after all the effort put in. This process highlights the importance of preservation in our natural world, showing how real fossils are safeguarded from the elements.
Applying a sealant can be straightforward, but can also require patience—seventh-grade finger-painting lessons revisited! The advantage here is longevity; the finished product can last for years, showcasing the hard work and creativity that went into it. However, do ensure proper ventilation when applying sealants, as some can emit fumes.
Throughout all these steps, the beauty lies in both the simplicity and depth of engagement. From the process of collecting and pressing to the thoughtful touches of artistry—each action builds knowledge, curiosity, and a love for learning about our planet and its history.
Experimenting with Different Materials
Getting your hands dirty while making fossils is a fundamental part of the learning process. Experimenting with different materials not only sparks creativity but also helps young scientists understand how texture, composition, and molding can impact the final result. It opens up a world where imagination can run wild and provides insights into the properties of various substances. By playing around with these materials, kids can develop a deeper appreciation of the science behind fossil formation and have fun while doing it.
Using Clay for Fossils
Creating fossils with clay is an exciting and tactile method that offers versatility in designs and results. Clay's malleability allows for varied impressions and can be easily adjusted to suit different needs during the crafting process.
Clay Types to Consider
When it comes to the types of clay, there are several options available. Air-dry clay, polymer clay, and traditional modeling clay each have their distinct characteristics. Air-dry clay is quite popular because it doesn’t require any special tools for drying. Once you create the impression, you simply leave it out and it will harden over time. This makes it a straightforward choice for beginners. Polymer clay, on the other hand, needs to be baked in an oven to firm up, allowing for more durable and intricate creations. Using polymer clay can enhance carefully crafted designs that hold significant detail.
However, one unique feature of air-dry clay is its lightweight nature, which makes it easier to handle for little ones. On the downside, it might not be as durable once fully dried, which could affect the quality of the fossil.
Impact of Texture on Impressions
Texture plays a critical role in the quality of impressions you create. Different textures yield varied results, which can influence how realistic the fossils appear. For instance, smooth clay tends to make softer imprints, while rough or textured clay can capture intricate details found in nature. This means that choose your surface right can help you translate the charm of real fossils into your creations.
Consider this: if you use a textured surface, you might get a more lifelike impression that captures minute details of the objects used for imprinting. Meanwhile, a plain surface may lead to more simplistic or even flat results.
This impact of texture allows little creators to experiment and refine their craft. However, some textures may be challenging to work with, particularly for younger hands, so it's good to keep that in mind when choosing.
Exploring Eco-Friendly Options
With an ever-increasing awareness of environmental issues, using eco-friendly materials is not just trendy but essential. It teaches young minds the importance of sustainability while they create.
Biodegradable Materials
Biodegradable materials are ideal for crafting because they decompose naturally over time. Using natural products like sand, dirt, or even plant-based clays reduces waste and promotes an eco-friendly mindset. This is beneficial for children to learn about the impact of their actions on the planet. The unique feature of these materials is that they allow for guilt-free creativity, as they won't linger in landfills for years to come.
While biodegradable options may not always produce the same strength or detail as polymer clay, they do foster a more conscious approach to crafting, making them a worthy option.
Recycling Household Waste for Arts
Recycling household waste for creative projects is not only affordable but also an engaging way to teach resourcefulness. Items like cardboard rolls, scraps of fabric, or even old newspapers can be transformed into unique creative fossil projects. This highlights the concept of upcycling and how even trash can be given a new life.
A major benefit of using recycled materials is that it encourages your little scientists to think outside the box. They can experiment with shapes, sizes, and designs, making every creation truly one-of-a-kind. However, it is important to note that while some recycled materials may lack the desired properties for crafting molds, with a bit of creativity, they can yield surprising results.
"One person's trash can be another person's treasure!"
In summary, experimenting with different materials lays a strong foundation for creativity while educating children on the intricate relationship between science and eco-friendliness. Whether it’s choosing the right kind of clay or repurposing old items, the possibilities are truly endless.
Engaging Educational Activities
Engaging educational activities serve as a bridge connecting theoretical knowledge with tangible experiences, making the learning process lively and effective. By involvement in hands-on tasks like fossil creation, children engage their minds, develop fine motor skills, and nurture curiosity about the natural world. Beyond mere fun, these activities promote critical thinking and teamwork. Science becomes an adventure, not just a set of facts to memorize.
Fossil Hunting Expeditions
Fossil hunting expeditions take learning outside the four walls of a classroom, placing kids in real-world settings that spark their interest in history, science, and environmental studies.
Local Sites for Fossil Collection
When we talk about local sites for fossil collection, we're referring to specific areas that are rich in geological history and offer opportunities for budding paleontologists to find real fossils. Look for places like riverbeds, cliffs, or quarries. They often yield intriguing samples. For instance, many parents frequent areas where the ground has been exposed due to construction. These sites can be a treasure trove for small fossils or even plant imprints.
One of the key characteristics of these sites is their accessibility. Unlike distant digs, local spots are easier to reach, which is especially important for families. Moreover, exploring these sites nurtures children's appreciation for nature. They learn firsthand how fossils formed and what ancient environments were like. However, it's crucial to guide them on where to search. Not every area is safe or legal for collection. This is where responsibility comes into play, encouraging kids to respect the environment while collecting.
Safety and Ethics in Fossil Hunting
The aspect of safety and ethics in fossil hunting cannot be stressed enough. Understanding how to engage with natural sites responsibly teaches children not only about science but also about community and environmental stewardship. Safety means being aware of potential hazards like slippery rocks or unstable ground. Teaching kids to use protective gear like gloves or even helmets in certain terrains can prevent accidents.
A key characteristic of ethical fossil hunting is the emphasis on permission. Collecting fossils should include respect for the landowners and understanding local laws. Parents should explain why it's disrespectful to take fossils from protected sites. This nurtures a sense of integrity among young explorers. It's crucial to convey that not all fossils belong to the curious finder. In addition, some sites may be home to endangered wildlife—encouraging kids to observe rather than interfere fosters a deeper relationship with nature.
Creating a Fossil Museum at Home
Creating a fossil museum at home offers children a chance to showcase their work creatively. It's a blend of art, science, and personal expression that turns the living room into a gallery of ancient pasts.
Display Ideas
When considering display ideas, think beyond traditional frames; how about a shadow box? Creating one adds layers of depth to each fossil presented. You might also think about using wooden shelves or even repurposed jars to exhibit prominent finds. Each fossil can sit proudly like a piece of art. Imagine a lineup of clay impressions labeled with dates and information about where they were found!
This method ignites enthusiasm. Kids value their creations more when they're displayed elegantly. Furthermore, displaying fossils also solidifies their identities as scientific discoverers. However, it's important to keep balance; too many impressions can clutter the display, reducing their impact. Choose selectively for a more powerful showcase.
Sharing with Family and Friends
Sharing with family and friends is an essential part of the learning journey. This fosters a sense of pride in accomplishments. Kids can showcase their fossils, explain the making process, and even share stories about their hunting adventures. This not only reinforces their learning but also helps solidify memory by verbalizing their experiences.
A unique feature of sharing is the interaction element. When inviting friends or relatives, children engage in discussions, answering questions and providing details about how certain fossils were made. This boosts confidence and public speaking skills, beneficial for their future. However, ensure to remind them that fossil sharing is also about humility—it's not just displaying, but also learning from others' experiences and collecting insights!
Closure
Creating fossils at home isn't just about mixing some ingredients and waiting for them to harden. It’s an engaging, hands-on way to connect with the fascinating world of paleontology. Understanding the process of fossil creation opens the door to curiosity about our planet's history and the life forms that roamed it millions of years ago. This experience delivers more than just knowledge about fossils; it serves as a catalyst for scientific inquiry.
Reflecting on the Learning Experience
When children undertake the process of making fossils, it turns into a multifaceted educational journey. They explore concepts such as preservation, environmental changes, and the significance of different materials. As they mold and paint their creations, they reflect on the intricate balance of nature and the stories fossils tell about ancient ecosystems.
Consider the satisfaction on a child's face when they see the impressions formed from leaves, shells, or toys – they gain not only a completed project but also an enriched understanding of how life has evolved. This project enhances critical thinking, as young minds compare their fossils with real ones, pondering the similarities and differences. Those moments spent pressing a leaf into dough or waiting for plaster to set foster discussions about geological time, evolution, and biodiversity.
Encouraging Continued Exploration
Encouragement is key! Once children have explored the initial stages of fossil-making, parents and educators can inspire further inquiry. This could be as simple as suggesting a local fossil hunting trip to a nearby beach or rock formation. Here, young explorers can seek real fossils, deepening their appreciation for geology and the stories that lie beneath their feet.
In addition, families can dive into other engaging activities related to fossils. For instance, hosting a mini-exhibit of the fossils created at home can spark discussions about extinct creatures. Maybe create art inspired by ancient life or even brainstorm new ideas for future fossils. The possibilities are vast, and by nurturing a child’s ambitions to learn, they begin to recognize the joy of science that extends past the project.
"The heart of science is not in the facts but in the wonder of discovery."
Ultimately, the hands-on experience of creating fossils serves as both a doorway to understanding our planet’s past and a springboard for endless curiosity about the world around them.


