Crafting Simple Slime: A Fun Guide for Kids

Intro
Slime is more than just a colorful, stretchy substance; it is also a fascinating way to explore basic scientific principles. Making simple slime at home can provide rich learning experiences for children and is a wonderful way for parents or guardians to engage with young learners. This guide offers practical steps, necessary materials, and safety considerations to ensure the process is both fun and educational.
Science Fun Facts
Before embarking on our slime-making journey, let's explore some interesting facts that make this activity even more exciting.
- Slime's Composition: Slime is primarily a polymer. Polymers are large molecules made up of repeating units, which gives slime its unique texture.
- Non-Newtonian Fluid: Slime behaves as a non-Newtonian fluid. This means it does not follow Newton's laws of viscosity. When you apply quick force, it becomes hard, but slowly applying pressure allows it to flow.
- Historical Trivia: The first commercial slime product was introduced by a toy company in the 1970s. It captivated children and adults alike, sparking interest in its scientific background.
"Slime is a delightful mixture of art and science, offering hands-on learning about viscosity and chemical reactions."
Discover the Wonders of Science
Making slime allows young scientists to observe reactions that happen in real-time. Here are some scientific concepts they can learn about while having fun:
- Viscosity: The thickness of liquids. Different recipes may yield varying viscosities, thus offering a hands-on opportunity to learn through comparison.
- Chemical Reactions: Mixing glue with a borax solution causes a reaction that creates the slime's texture. Understanding the balance of ingredients initiates a discussion on ratios and measurements.
Educational videos available on Britannica can provide further insights into the science behind slime, while interactive learning tools such as simple slime calculators found online can make learning about measurements easier.
Science Experiment Showcase
Fun and Engaging Experiments
Let's delve into how to make slime! Here’s a basic recipe that is simple enough for children to follow.
Step-by-Step Instructions
- Gather your materials:
- In a bowl, pour about ½ cup of glue. Add a few drops of food coloring if desired.
- Mix in 1 teaspoon of baking soda. Stir until fully combined.
- Add 1 tablespoon of contact solution gradually while mixing. The slime will begin to form and pull away from the bowl.
- Knead the slime with your hands until it reaches your desired consistency.
- White school glue (like Elmer's Glue)
- Baking soda
- Contact solution (which contains boric acid)
- Food coloring (optional)
- Mixing bowl
- Spoon
Materials List
- White school glue
- Baking soda
- Contact lens solution
- Food coloring
Safety Tips and Precautions
- Ensure children wash hands after the activity.
- Keep materials away from eyes and mouth.
- Supervise young children as needed during the activity.
Ending
Creating slime at home not only offers a playful experience but also a wealth of scientific knowledge. As children experiment with different recipes and variations, they will gain an understanding of materials, reactions, and methods that underscore fundamental scientific principles.
With careful supervision and an emphasis on safety, slime-making can be a treasured activity that nurtures curiosity and cognitive growth in young minds.
Prelude to Slime
Slime has gained popularity in recent years, becoming a staple in fun and educational experiments for children. Its tactile nature and variety in texture engage kids in hands-on learning. This section serves as an introduction to slime, explaining its significance in scientific exploration and creativity.
Making slime promotes STEM (Science, Technology, Engineering, and Mathematics) education among young minds. Children learn about basic chemical reactions, measurements, and observations through the process of creating slime. Moreover, it allows them to express creativity through customization and experimentation with various colors and textures. For parents and caregivers, it is a chance to bond with children while introducing them to scientific concepts in an enjoyable way.
Ultimately, this section emphasizes that slime is not just a plaything; it is an educational tool that can foster curiosity and critical thinking in a safe environment.

Materials Needed
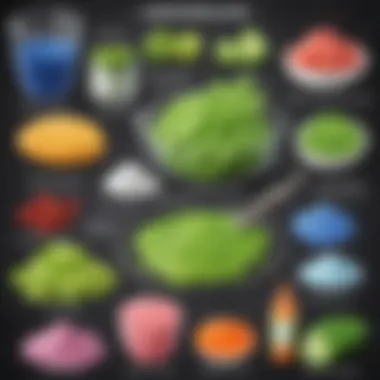
Understanding the materials needed is fundamental in the process of making slime. The right ingredients ensure a successful outcome. Familiarity with these materials aids not only in the fun but also in the scientific exploration that comes with creating slime. Each component plays a specific role in how the slime forms and its final texture. Proper preparation can minimize errors and enhance the overall experience.
Basic Ingredients
The basic ingredients for slime are quite simple. They include:
- White school glue: This is the primary base for most slime recipes. Polyvinyl acetate, a water-based adhesive, gives slime its essential stretchy and moldable qualities.
- Baking soda: This ingredient acts as a thickening agent. It helps to create the right consistency by interacting with glue.
- Contact lens solution: This component contains boric acid and sodium borate, crucial for transforming the glue mixture into slime. Without this, the glue would remain liquid and unformed.
- Water: Typically used to dilute the glue or adjust the slime's texture. It plays a minor role but is still important.
A simple measuring process is all that’s needed. Start with equal parts of glue and water, and then mix in a bit of baking soda. The amount of contact lens solution is then added gradually until it reaches the desired consistency. Knowing these ingredients creates a solid foundation for any slime-making session, ensuring that the fun does not turn into frustration.
Optional Additives for Variation
Optional additives allow for exciting variations in the basic slime recipe. Exploring these can enhance creativity. Here are some popular options:
- Food coloring: This provides a simple way to customize the color of the slime. Adding a few drops will give the slime a personalized touch.
- Glitter: For those wanting a bit of sparkle, glitter can make the slime visually appealing. Choose different colors or sizes for unique effects.
- Foam beads: These add texture and a unique feel to slime, transforming it into a sensory experience.
- Essential oils: If you wish to incorporate a soothing scent, essential oils can be used. It is important to choose skin-safe, non-toxic options.
- Shaving cream: To create the fluffy slime variation, shaving cream can be mixed in. It alters the texture, making it puffier and lighter.
Experimenting with these additives can result in distinct types of slime. This encourages children to think creatively and engage in playful learning. Always remember to check the safety of the additives before using them.
Choosing the Right Recipe
Selecting the proper recipe is crucial when making slime at home. Each recipe yields a different consistency and texture. Different types of slime can serve various purposes, from sensory play to decorative uses. Knowing the right recipe ensures that you achieve the desired result, keeping the experience enjoyable for children and easy for parents to manage.
Different recipes offer unique benefits and challenges. Standard slime is basic but versatile, while fluffy slime introduces a light, airy quality. Glow-in-the-dark slime inspires creativity in a different way, making it fun even in low-light conditions. By understanding the specific characteristics of each type, you can better guide children through their slime-making adventure.
It is also essential to consider the skill level of those involved. Some recipes might require more precise measurements or techniques. Taking this into account can make the difference between a successful experiment and frustration. Therefore, choosing the right recipe aligns with the goals of your slime-making activity, whether that's educational or simply for fun.
Standard Slime Recipe
The standard slime recipe serves as the foundation for many slime projects. It is straightforward and does not require many ingredients. Typically, it combines white school glue, water, and a slime activator like borax or contact lens solution. Here’s how to prepare it:
- In a bowl, mix one cup of white school glue with half a cup of water.
- Stir the mixture until smooth.
- In a separate bowl, mix one teaspoon of borax with one cup of warm water.
- Slowly add the borax solution to the glue mixture while stirring continuously.
- Once the slime starts to form, knead it with your hands until it reaches the desired consistency.
This recipe is simple, yet it provides a satisfying result that can be customized with colors and glitter.
Fluffy Slime Variation
Fluffy slime is a more whimsical option that adds volume and softness to the slime. This variation is popular among children because of its unique texture. To create fluffy slime, the ingredients change slightly:
- Combine one cup of white school glue with half a cup of shaving cream in a bowl.
- Mix until well combined and fluffy.
- Add food coloring if desired to create vibrant colors.
- In a separate bowl, mix one teaspoon of baking soda with one tablespoon of contact lens solution.
- Combine the two mixtures and continue to knead until it feels right.
This type of slime is perfect for sensory play and can also be used to teach mathematical concepts such as volume and measurement.
Glow-in-the-Dark Slime
Glow-in-the-dark slime captivates attention, especially in dim environments. This type of slime allows for creative play in unique settings. To create it, you can follow these guidelines:
- Begin with the standard slime recipe as a base.
- Add glow-in-the-dark paint or liquid to the mixture before adding the activator. Most craft stores provide paints specifically for this purpose.
- Follow the standard slime mixing and kneading process.
- Once done, expose the slime to light for a few minutes to activate the glow properties.
Glow-in-the-dark slime can spark interest in science, especially in understanding how light interacts with materials. It encourages children to explore further and experiment with various light sources.
The right slime recipe sets the stage for a successful and fun learning experience!
Step-by-Step Instructions


Understanding how to follow step-by-step instructions is crucial for making slime at home. This guide offers clarity on the process, ensuring that you have a successful slime-making experience. Proper instructions outline what needs to be done, in what order. This prevents confusion and adds efficiency to the process. Following steps properly can result in a better final product. Educationally, students learn to adhere to instructions, a vital life skill.
Preparing the Workspace
Before diving into the slime-making process, setting up a clean and organized workspace is important. A tidy area helps focus on the task without distractions. Use a flat surface like a table or countertop. Gather all necessary tools and materials to avoid interruptions. A good workspace also minimizes accidents, keeping your area free from unwanted spills.
Consider covering surfaces with newspapers or plastic tablecloths to ease cleanup. Wear old clothes or an apron to prevent any stains. Always have soap and water nearby for quick cleaning afterward.
Mixing the Slime Ingredients
Now, combine the chosen ingredients carefully. Begin by taking a bowl for mixing the slime components. Pour a specified amount of glue into the bowl first. Next, gradually add your activator, like borax solution or contact lens solution, stirring constantly. The mixing should occur slowly. This ensures that all components blend well without clumps. In this stage, patience is key as the ingredients change form. When the mixture starts to pull away from the sides of the bowl, it indicates the right consistency is nearing.
Consider adding any optional ingredients now, like food coloring or glitter, to customize your slime. This enhances the tactile experience and allows for creativity.
Kneading the Slime
Once the mixture forms a slime consistency, it’s time to start kneading. Kneading allows you to achieve the desired texture and elasticity. First, remove the slime from the bowl and place it on a clean surface.
Begin kneading with your hands. It might feel a bit sticky at first. If so, don’t worry. Continue to fold and stretch the mixture, working it until it becomes smooth. Kneading can take several minutes, and this process is crucial since it brings the slime together effectively. If the slime is still too sticky after thorough kneading, it may require a little more activator.
When the slime reaches a satisfactory texture, it should be soft yet not overly sticky. This finished product is ideal for sensory play or educational activities.
Don’t forget to clean your workspace again after kneading. Keeping everything tidy is part of the process and helps for easier cleanup next time.
The above steps ensure that you not only make slime but also understand the activity's educational and fun aspects. Following these instructions closely will likely lead to a successful slime-making experience.
Safety Considerations
Creating slime at home is a fun and engaging activity, but it is crucial to prioritize safety throughout the process. Safety considerations extend beyond simply enjoying the activity; they ensure that the experience is educational and secure for everyone involved. This is especially important for young children who may not fully understand the implications of using certain materials. By focusing on safe practices, families can foster a positive atmosphere that encourages scientific exploration without compromising health or well-being.
Choosing Safe Ingredients
Selecting the right ingredients is pivotal in making slime. It is advisable to use materials that are non-toxic and free from harsh chemicals. For example, simple ingredients like white school glue, baking soda, and water are usually safe and widely available. Clearly check labels on products to confirm their safety.
- Here are some safe ingredient options:
- White school glue: A common base for most slime recipes.
- Baking soda: Acts as a thickening agent and is safe for children.
- Contact lens solution: Often contains boric acid, which can help create the slime’s stretchy texture.
- Food coloring: Best to use edible coloring to ensure that it is safe if accidentally ingested.
Avoid using ingredients like liquid starch or certain laundry detergents, which can be irritating to the skin. Adopting a careful approach to ingredient selection helps in creating a worry-free slime-making experience.
Supervision Recommendations
When children participate in slime-making, adult supervision is strongly recommended. This ensures that children use the materials correctly and don’t engage in any unsafe practices. It is beneficial for adults to explain the purpose of each ingredient and the need for safety.
Parents and caregivers should also encourage children to wash their hands before and after the activity. In addition, it is wise to create a designated space for making slime. This helps to contain any mess while ensuring safety.
Supervision can turn slime-making into a valuable learning experience. Adults can guide children through the scientific principles at play, enhancing the educational aspect of the activity.
By fostering a safe atmosphere, both children and adults can fully enjoy the artistic and educational benefits of making slime. This can lead to increased confidence and independence in handling similar projects in the future.
Common Problems and Solutions
Understanding how to troubleshoot common slime-making issues is crucial for achieving the desired consistency and quality of slime. This section focuses on the two most prevalent problems encountered during the slime-making process: excessive stickiness and difficulty in holding together. Addressing these issues provides a clearer pathway for creating a satisfactory slime experience. Each aspect is analyzed to give practical solutions. Furthermore, identifying these problems contributes to a more engaging and successful slime-making session for young science enthusiasts.
Slime is Too Sticky
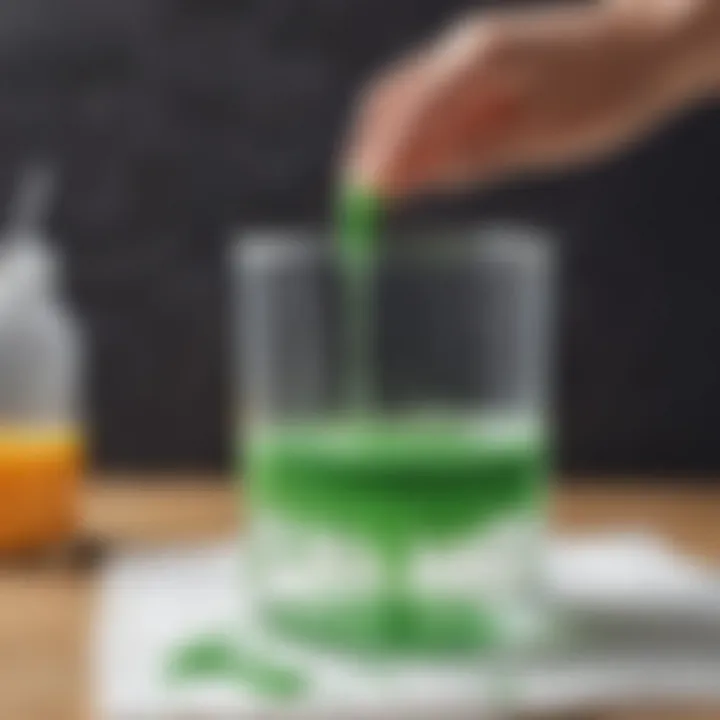
One common issue when making slime is that it can end up being too sticky. This stickiness can frustrate children and deter them from fully enjoying the slime they created. Here are some reasons that might cause this sticky texture:
- Under-mixing: If the ingredients are not combined thoroughly, the resulting slime may not reach the correct consistency.
- Too Much Glue: Using an excessive amount of glue in the mixture can lead to a sticky outcome.
- Humidity: Higher humidity levels in the environment can affect the slime’s texture, resulting in additional stickiness in the final product.
To resolve this problem, consider the following solutions:
- Add Small Amounts of Activator: If your slime is too sticky, gradually add more activator, such as contact lens solution or a borax solution. This should be done little by little, as adding too much can alter the quality.
- Knead Well: Kneading is critical. Take time to knead the slime thoroughly; this helps incorporate air and improve the texture.
- Adjust Environment: If humidity is a factor, try to work in a drier location.
By being attentive to these details, you can help ensure that the slime is enjoyable to stretch, squish, and shape.
Slime Does Not Hold Together
Another frequent complication is when slime does not hold together properly. This issue can reduce the slime’s playability. When slime lacks cohesion, it can result in more frustration than fun. Here are several factors that might contribute to this issue:
- Insufficient Activator: Without enough activator, the slime cannot form properly, leading to a loose texture.
- Wrong Ratios: Incorrect mixing ratios of glue to activator can lead to an unsatisfactory outcome.
- Short Mixing Time: Not mixing long enough can prevent the activator from properly interacting with the glue.
To tackle this problem, consider the following solutions:
- Increase Activator Amount: If the slime is falling apart, introduce a bit more of your activator. Mix thoroughly to see if the texture improves.
- Check the Recipe: Make sure that you are following the recipe correctly, with proportional amounts of glue and activator.
- Give It Time: Allowing the slime to sit for a few minutes after mixing can help it to come together as the ingredients bond fully.
By understanding and addressing these common problems, you can enhance your slime-making experience. Troubleshooting enhances not only the effectiveness of your slime recipe but also fosters a learning environment focused on experimentation and scientific principles.
Storing and Maintaining Slime
Storing and maintaining slime is crucial for ensuring its longevity and usability. After creating your slime, proper storage methods not only prolong the life of the slime but also help to keep it safe and enjoyable for future use. The key aspects of slime maintenance include appropriate storage containers, the environment in which the slime is kept, and regular checks for consistency and quality. Making sure that the slime remains in good condition enhances the overall experience for children and adults alike.
Best Practices for Storage
When it comes to storing slime, there are a few best practices to keep in mind. Here are some recommendations:
- Use Airtight Containers: Always store slime in airtight containers to prevent air exposure. This minimizes drying out and helps maintain its texture. Containers like plastic tubs with secure lids work well.
- Cool, Dry Place: Keep slime away from direct sunlight and heat sources. A cool, dry spot helps preserve its quality. Avoid placing it near windows or in warm rooms.
- Label Containers: If you have multiple slimes, label each container. This can indicate the type of slime and its creation date. This information is helpful for parents when managing kids’ various projects.
- Avoid Mixing Slimes: Each slime has different properties based on its ingredients. Mixing slimes can result in unpredictable textures and colors. Store each type separately to maintain their unique characteristics.
"Proper slime storage will ensure that your creation remains fresh and enjoyable over time."
How Long Does Slime Last?
The lifespan of slime largely depends on the materials used and how it’s stored. Generally speaking, slime can last anywhere from one week to several months under optimal conditions. Here are some points to consider:
- Duration Based on Ingredients: Simple slime made from standard ingredients like school glue and borax tends to last longer than more complex recipes that include additives. Slim variation such as fluffy or glitter slime might degrade quicker due to air exposure that causes the ingredients to separate.
- Signs of Aging: If the slime appears dry, crumbly, or too sticky, it may be nearing the end of its usable life. It’s best to dispose of any slime that shows signs of mold or unpleasant odors.
- Regular Checks: Check the stored slime every few weeks. If you notice any changes in texture or smell, it is better to discard and make a fresh batch.
Closure
Engaging children in slime-making also promotes critical thinking. If a particular batch does not turn out as expected, they have the opportunity to troubleshoot issues, which can lead to deeper understanding and problem-solving skills. By observing the effects of various ingredients and modifications, like changing the ratios of glue to activator or introducing different colors and textures, kids can grasp fundamental scientific principles in a practical manner.
Furthermore, this activity can strengthen bonds between children and their caregivers or educators. Working together to make slime not only makes for a memorable experience but also offers a platform for discussions about safety, measurements, and even the nature of non-Newtonian fluids. Collaboration helps cultivate a supportive learning environment; it allows for shared learning, where questions can be asked freely, and discoveries can be made together.
Overall, slime-making holds numerous benefits. It is a pathway to scientific exploration, an opportunity for experiential learning, and a way to cultivate closer relationships in a safe, guided environment. This simple DIY project showcases how fun and science can merge, making education both engaging and informative.
Encouraging Scientific Exploration
Encouraging scientific exploration through activities like slime-making can significantly impact children's understanding of the world around them. Slime is not just a tactile substance; it embodies various scientific concepts such as viscosity, elasticity, and chemical reactions.
When children mix basic ingredients like glue and borax or baking soda, they witness a chemical interaction firsthand. This instant feedback fosters their interest in how things work. They may ask questions like, "What happens if I add more glue?" or "How does salt change the texture of slime?" These inquiries are pivotal as they lead to critical conversations about experimentation and the scientific method.
Additionally, involving children in the process of measuring ingredients cultivates mathematical skills. They learn to quantify, compare, and analyze results, which strengthen foundational math concepts. Simple logs or journals can be kept to record successes or challenges faced while making slime.
More than just an exciting hands-on activity, slime-making is a gateway to deeper learning. It encourages children to take an interest in science, promotes curiosity, and highlights the joy of discovery in both small and large-scale experiments.
"Through playful engagement with materials, children can learn to think like scientists."
By embracing such simple yet profound activities, parents and caregivers play a crucial role in nurturing a future generation that values knowledge, creativity, and exploration.


